Successfully commissioning a new coil packing line is a critical step towards optimizing your operational workflow. The initial startup isn't just about powering on the machinery; it's a meticulous process ensuring every component—from power supplies to sensors and conveyors—functions harmoniously. A rushed or unprepared first run can lead to inefficiencies, downtime, and potential safety risks. This guide provides a structured, instructional approach based on industry best practices for initiating your coil packing line setup effectively the first time.
Reflecting on numerous installations, the difference between a smooth startup and a challenging one often lies in methodical preparation and verification. This involves confirming stable power and air, rigorously testing individual station functions manually, calibrating sensors precisely, and carefully transitioning to full automation. Overlooking any single step in this coil handling equipment startup sequence can disrupt the entire line.
Understanding the *why* behind each step is as crucial as the *what*. For instance, manual station testing isn't merely a redundancy check; it's fundamental for isolating potential mechanical or electrical issues before they cascade in automatic mode. Similarly, precise sensor calibration prevents errors that could halt production.
Confidence in your coil packing line's performance starts with a thorough and well-executed commissioning process. Let’s explore the essential steps required to ensure your line operates safely, reliably, and productively from day one.
1. Verifying Essential Connections: Power and Air Supply
1.1. Ensuring Stable Power and Pneumatic Supply
Before initiating any operational tests, the first critical step is to confirm a stable and adequate supply of both electricity and compressed air. These are the fundamental lifelines for your automatic coil packaging system. Verify that the voltage, amperage, and phase of the electrical supply match the machine's specifications precisely. Check that compressed air lines deliver clean, dry air at the required pressure (PSI or Bar), free from fluctuations.
- Electrical Checks: Confirm main power disconnects, check terminal connections for tightness, and ensure proper grounding is in place according to safety regulations. Refer to resources like OSHA's electrical standards for guidance.
- Pneumatic Checks: Inspect air filters, regulators, and lubricators (FRL units). Bleed air lines to remove moisture and ensure pressure gauges read correctly.
1.2. Consequences of Unstable Connections
Inconsistent power or fluctuating air pressure can cause erratic machine behavior, including incomplete cycles, motor overheating, sensor malfunctions, and abrupt shutdowns. Loose electrical connections pose a fire hazard, while contaminated or low-pressure air can lead to sluggish pneumatic actuator performance and premature component wear. Thoroughly securing all connections—cables, conduits, pneumatic fittings—is essential to prevent costly troubleshooting and downtime later.
1.3. Utilizing Diagnostic Tools
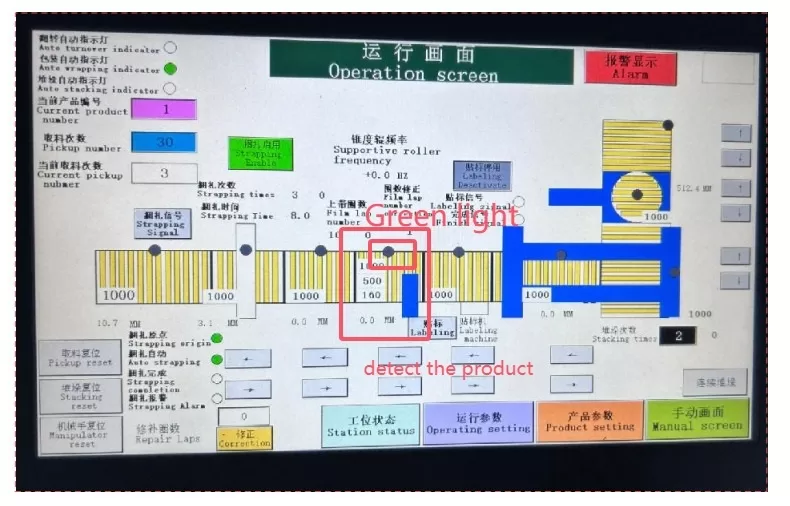
Modern coil packing lines often feature integrated diagnostic systems accessible via the Human-Machine Interface (HMI). These systems can monitor incoming power quality and air pressure, providing alerts for irregularities. Familiarize your team with these diagnostic screens and alarm codes during the commissioning phase. Understanding these early warnings allows for proactive adjustments before minor issues escalate into major problems.
2. Conducting Manual Station Tests for Functional Validation
2.1. Isolating and Testing Individual Functions
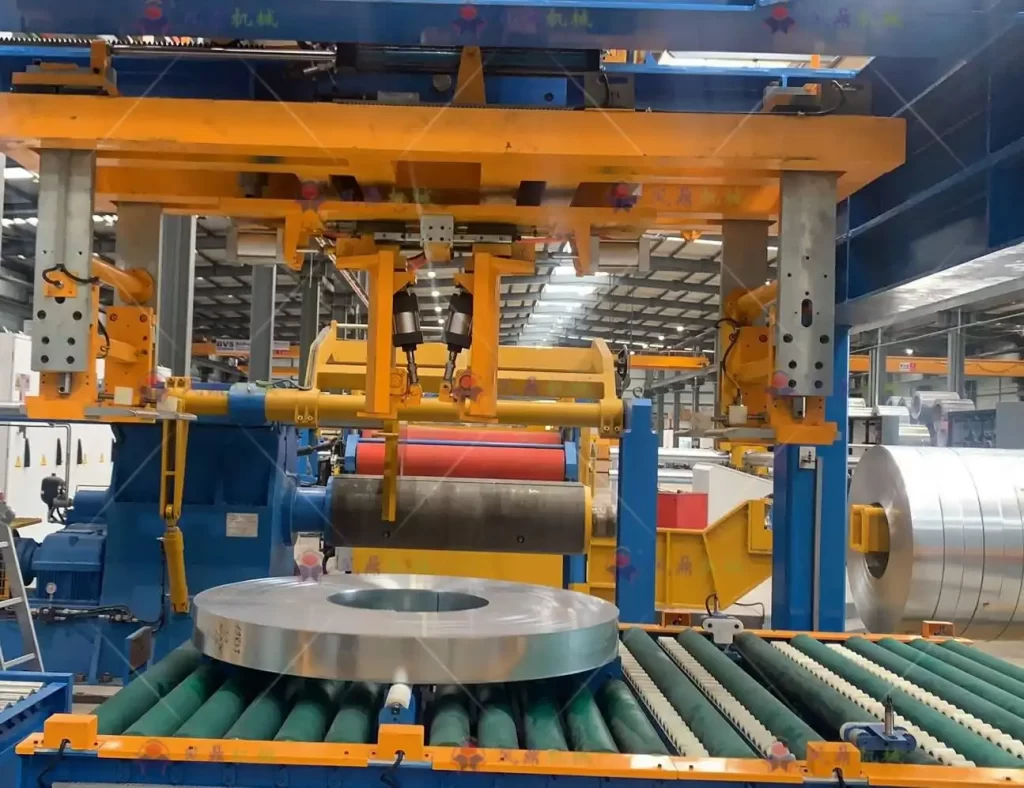
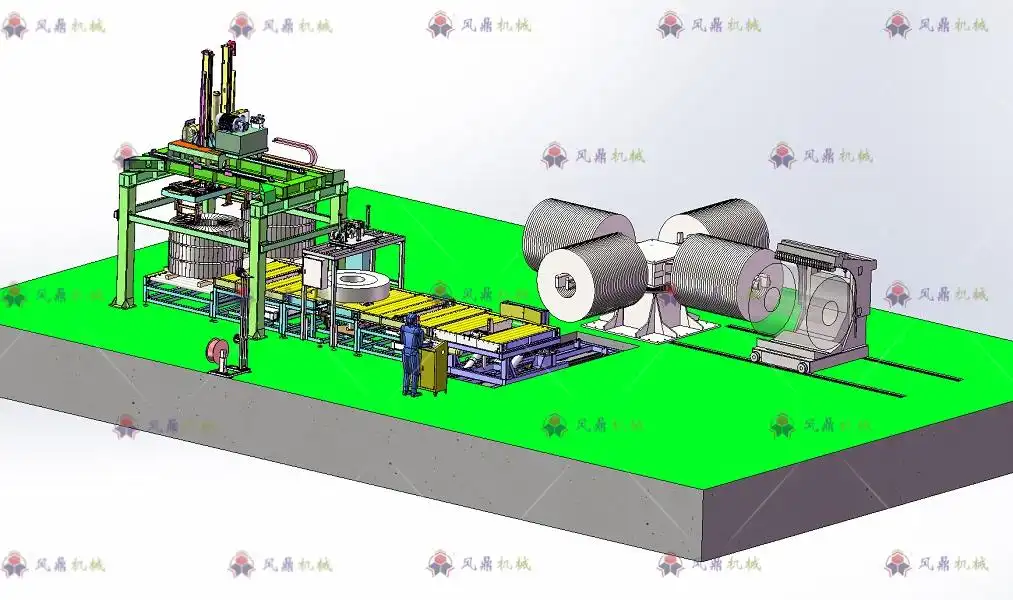
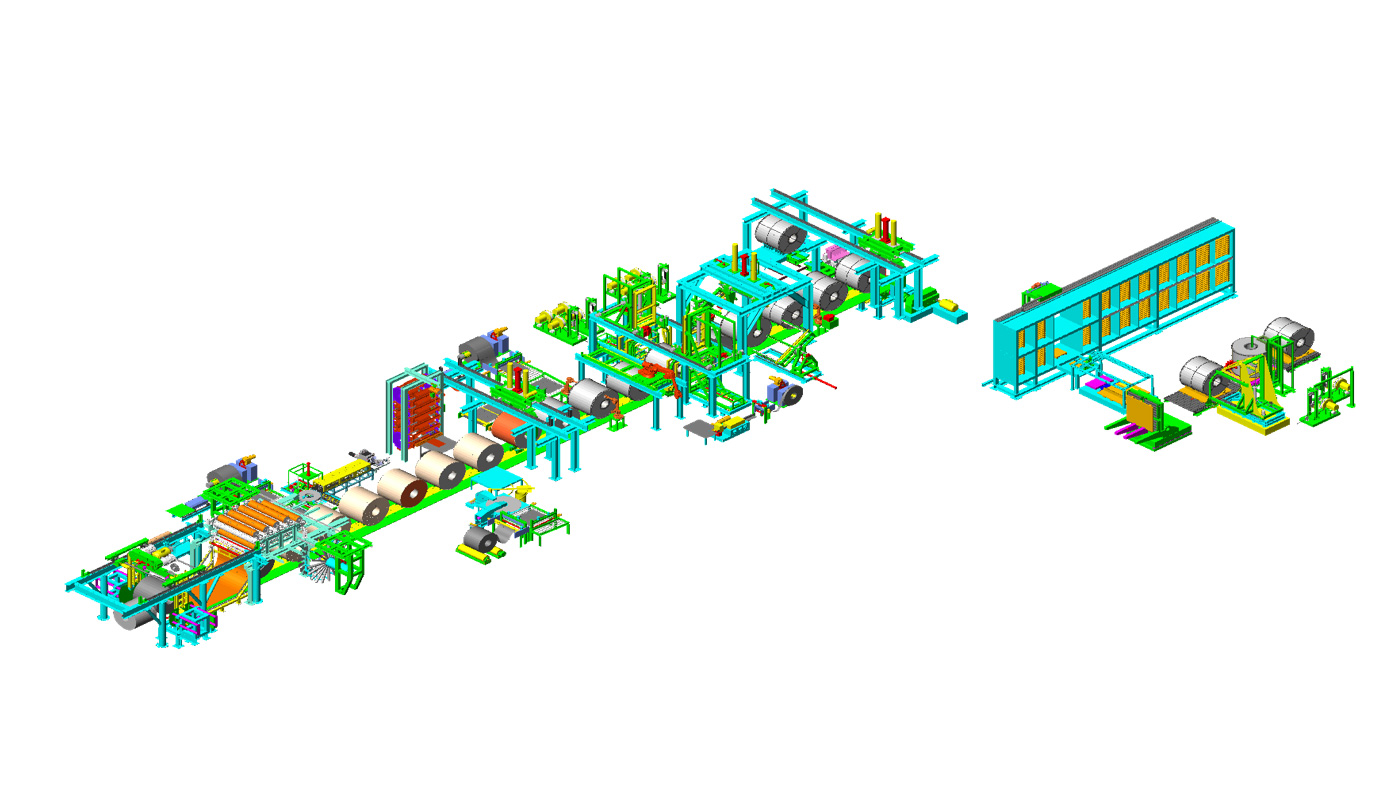
Before running the entire line automatically, each station (e.g., coil loading, centering, wrapping, strapping, stacking, unloading) must be tested individually in manual or jog mode. This allows operators to verify the correct mechanical movement, electrical response, and sensor activation for each specific task. Access the manual controls, typically through the HMI, to activate components like motors, conveyors, clamps, cutters, and actuators one by one.
During these tests, observe:
- Smooth and correct movement of mechanical parts (no binding, excessive noise, or vibration).
- Proper engagement and disengagement of drives, clutches, and brakes.
- Correct sequencing and timing of pneumatic or hydraulic cylinders.
- Accurate triggering of associated sensors (limit switches, proximity sensors) as components reach their intended positions.
- Functionality of safety devices like emergency stops and light curtains associated with that station. Adhering to machine guarding principles is paramount.
2.2. Identifying and Addressing Issues Early
Manual testing is the prime opportunity to catch issues like motor misalignment, incorrect conveyor belt tension, improperly adjusted mechanical stops, or faulty wiring before they cause problems in automatic operation. For example, if a wrapping station's film gripper doesn't apply consistent pressure, it can be adjusted or repaired immediately. If a conveyor section runs unevenly, its drive system or rollers can be inspected.
Use the HMI's I/O (Input/Output) diagnostic screens during manual tests. This helps confirm that the Programmable Logic Controller (PLC) is receiving the correct signals from sensors and sending the correct commands to actuators. Discrepancies here often point to wiring issues, faulty components, or incorrect PLC logic parameters.
2.3. Simulating Loads and Conditions
Where feasible and safe, use sample coils or simulated loads during manual testing. This helps verify that load-bearing components, weight sensors, and positioning mechanisms function correctly under realistic conditions. For instance, manually feeding a test coil ensures the loading station's alignment guides and conveyors handle the weight and dimensions properly. This step adds a layer of validation beyond testing empty machine movements.

3. Calibrating Optical Switches and Sensors for Accuracy
3.1. The Critical Role of Sensors
Optical switches (photoelectric sensors), proximity sensors, limit switches, and encoders are the "eyes and ears" of the automated coil packing line. They detect coil presence, position, dimensions, and movement, triggering subsequent actions like wrapping, strapping, or conveying. Common types include through-beam, retro-reflective, and diffuse photoelectric sensors, each suited for different detection tasks. Their accurate function is essential for process synchronization and preventing collisions or jams.
3.2. Precision Calibration Procedures
Sensor calibration involves adjusting parameters like detection range (sensitivity), response time, and alignment to ensure reliable and repeatable detection. This is often done via potentiometers on the sensor itself or through the HMI software.
- Alignment: Ensure transmitting and receiving elements (for through-beam or retro-reflective types) are perfectly aligned. Reflectors must be clean and correctly positioned.
- Sensitivity: Adjust sensitivity so the sensor reliably detects the target object (coil) but ignores background elements or minor environmental changes (dust, light). Test with the actual range of coil sizes and materials the line will handle.
- Signal Verification: Use the HMI's diagnostic or I/O monitoring screen to confirm that the PLC receives a clear 'ON' or 'OFF' signal when the sensor is triggered or cleared. Check for signal "chatter" or instability.
Consult the sensor manufacturer’s documentation and resources like educational guides on sensor basics for detailed calibration instructions specific to the models used.
3.3. Testing Sensor Integration with System Logic
After individual calibration, test how each sensor interacts with the overall control system logic. Manually place or move a coil (or test object) to trigger sensors and observe if the corresponding machine action occurs correctly and promptly. For example, does the wrapping cycle initiate immediately when the coil presence sensor at the wrapping station is triggered? Does the conveyor stop when a coil reaches the end-of-line sensor? Misaligned timing or incorrect logic sequencing often indicates problems with sensor placement, calibration, or PLC programming parameters.
4. Transitioning Smoothly to Automatic Operation
4.1. Phased Activation of Automatic Mode
Once manual tests and sensor calibrations are complete, the transition to automatic mode should be gradual. Start by configuring the necessary operational parameters via the HMI – coil recipes (dimensions, weight), wrapping parameters (film tension, overlap), conveyor speeds, and cycle settings. Begin with a "dry run" in automatic mode without any coils to observe the sequencing and interaction between stations. Ensure all movements are synchronized and occur as programmed.
Next, introduce coils one at a time at a reduced operating speed. This allows operators to carefully monitor the entire process – loading, transfer between stations, processing (wrapping/strapping), and unloading – identifying any potential bottlenecks, timing issues, or positioning inaccuracies under load.
4.2. Continuous Monitoring and Observation
During these initial automatic runs, continuous monitoring is crucial. Operators should closely watch the machine's physical operation and simultaneously monitor the HMI for status updates, cycle times, and any error messages or alarms. Pay attention to:
- Consistent coil positioning and transfer between stations.
- Correct application of packing materials (film tension, strap placement).
- Smooth acceleration and deceleration of motors and conveyors.
- Accurate performance of automated adjustments (e.g., guide rail positioning based on coil size).
- System response to sensor inputs in real-time.
4.3. Fine-Tuning for Optimal Performance
Based on observations during the initial automatic runs, fine-tuning is often necessary. This may involve adjusting PLC timer values, PID loop parameters for tension control, motor speed profiles (acceleration/deceleration ramps), or sensor positions slightly. The goal is to achieve smooth, efficient, and reliable operation at the target production rate. Document any adjustments made for future reference. Following established operational best practices can guide this optimization process.
Only after the line demonstrates stable and correct operation at reduced speed should the throughput be gradually increased to the desired production level, continuing careful monitoring throughout the ramp-up phase.
Conclusion: Achieving a Successful Coil Packing Line Startup
Commissioning a coil packing line effectively requires a systematic and detailed approach. By diligently verifying power and air connections, performing thorough manual tests on each station, precisely calibrating all sensors, and executing a phased transition to automatic mode with careful monitoring and fine-tuning, you establish a solid foundation for reliable and efficient operation. This methodical process minimizes initial setbacks and ensures your investment performs optimally from the start.
[Claim: A well-executed coil packing line startup process transforms complex machinery into a productive, safe, and dependable asset, ready to meet your operational demands.]
Get Your Best Solution !